How to Increase Sleep Mode Time in Windows 10
Sleep mode is a low power mode in computers which helps saving plenty of electrical power. But you may meet the situation that the computer won't go to Sleep Mode like it used to. If you want to solve this issue, this post gives you 4 methods to fix this issue.
Try these fixes:
There are 4 fixes that can help you solve the "Windows 10 won't sleep" issue. You don't need to try them all, work your way down until you find a way that works for you.
- Change Power Options
- Check for Power Requests
- Use the Power Troubleshooter
- Update your device driver
Fix 1: Change Power Options
Change power options is a common fix for the Windows 10 won't sleep issue.
Here's how:
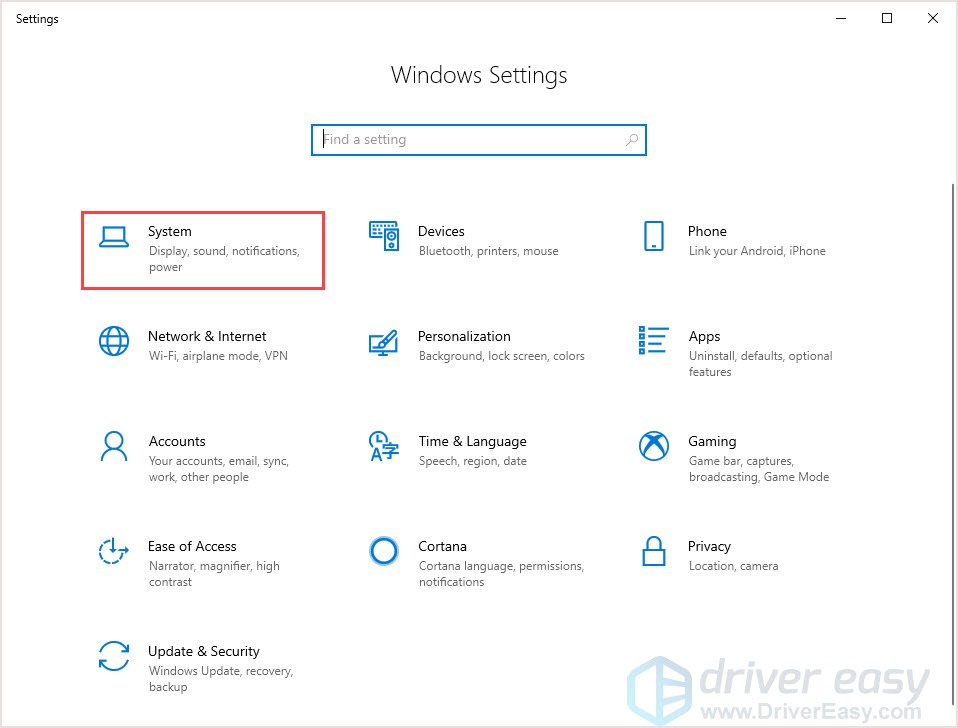
- Press the Windows logo key + I and click System.
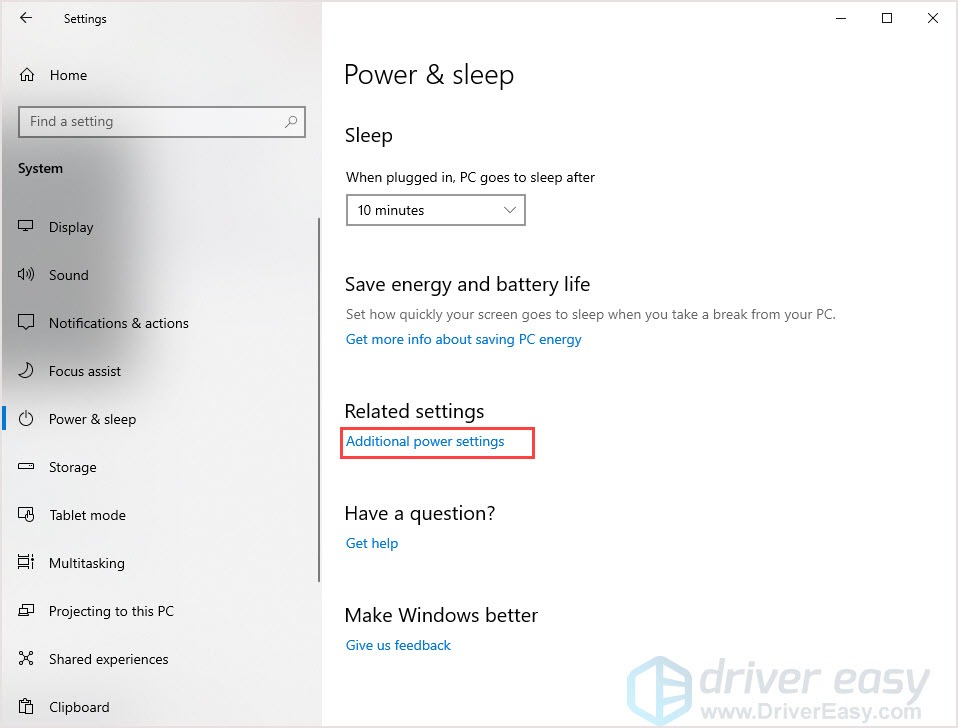
- Choose the Power & sleep tab then click Additional power settings.
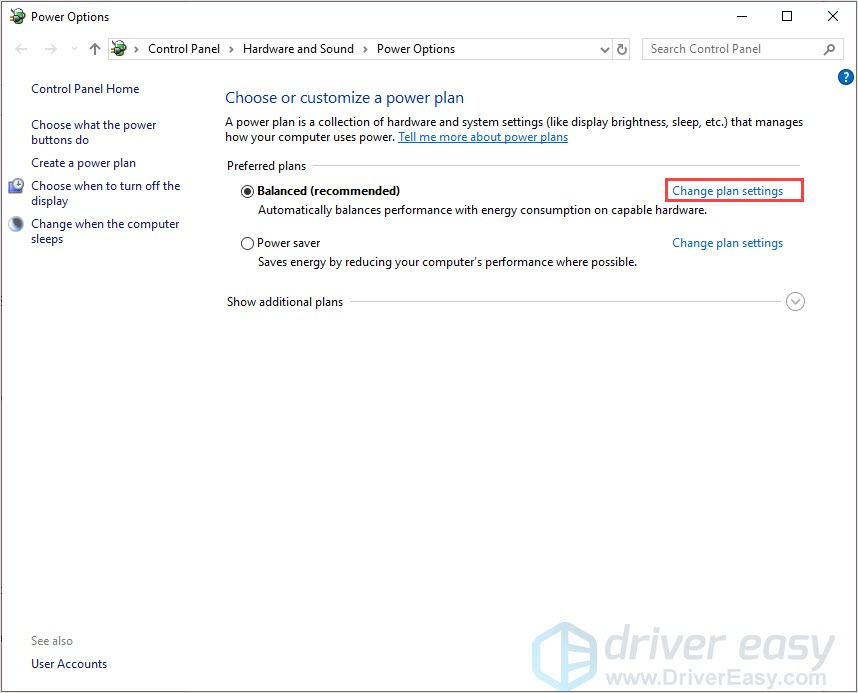
- Click Change plan settings near Balanced (recommended).
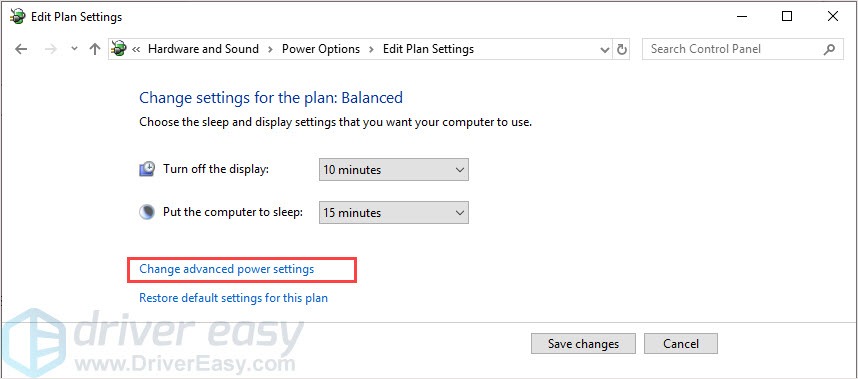
- Click Change advanced power settings.
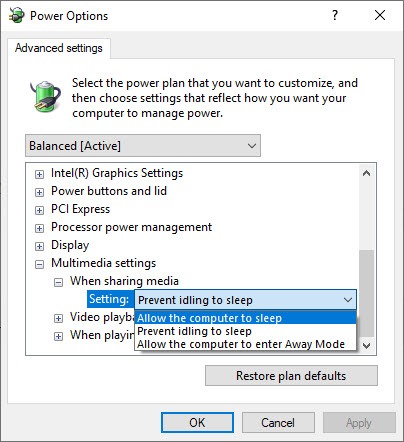
- Scroll down to the bottom, click
Multimedia settings >
When sharing media >
Setting: Prevent idling to sleep.
Change it to Allow the computer to sleep. Then click OK.
Or, you can click the isolated button at the bottom Restore plan defaults to solve the problem.
Fix 2: Check for Power Requests
Windows has an inbuilt command prompt to help you identify which process is interrupting the sleep process. Once you have found out the process, you can stop it.
- Press the Windows logo key + R together to open the Run box.
- Type cmd and press Ctrl + Shift + Enter together to open the Command Prompt as administrator.

- Type powercfg /requests (there's a space after g) and press Enter.
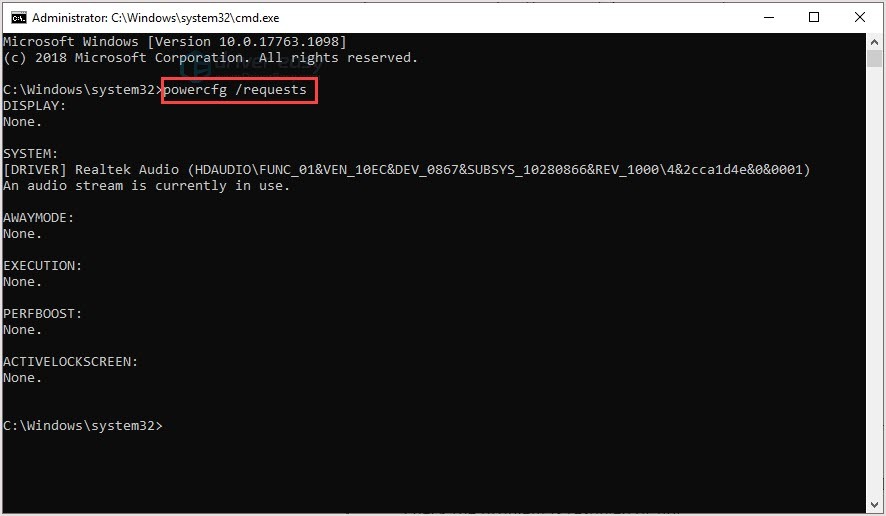
- Disable the program that disturbs the system into sleep mode. Then check the problem is resolved or not.
Fix 3: Use the Power Troubleshooter
Windows system has an inbuilt program to help you solve the problems. You try Power troubleshooter to resolve this problem.
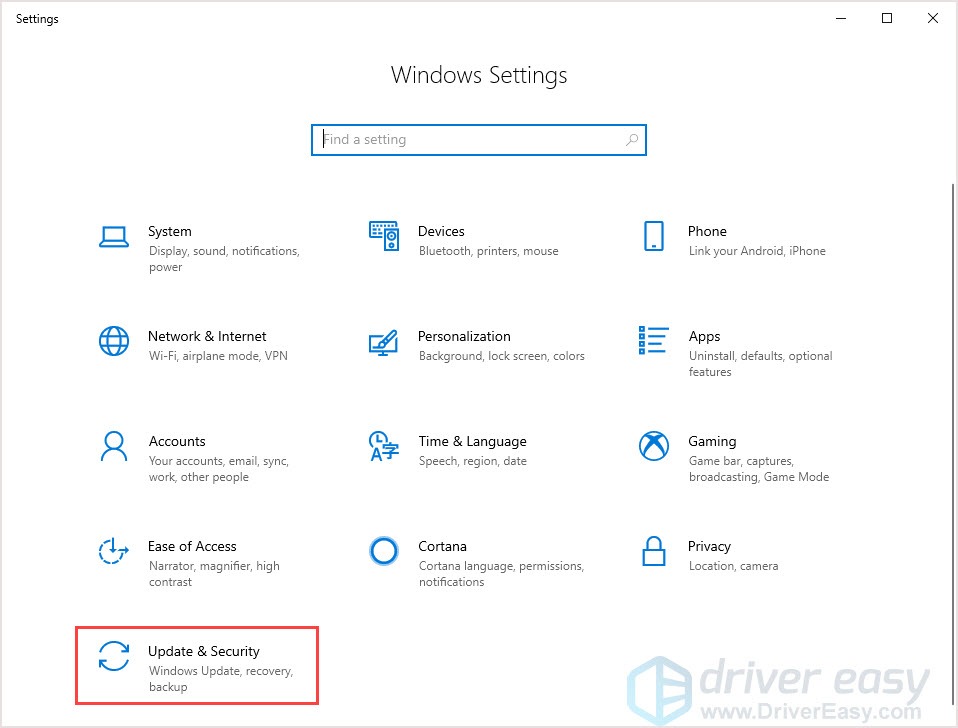
- Press the Windows logo key + I and click Update & Security.
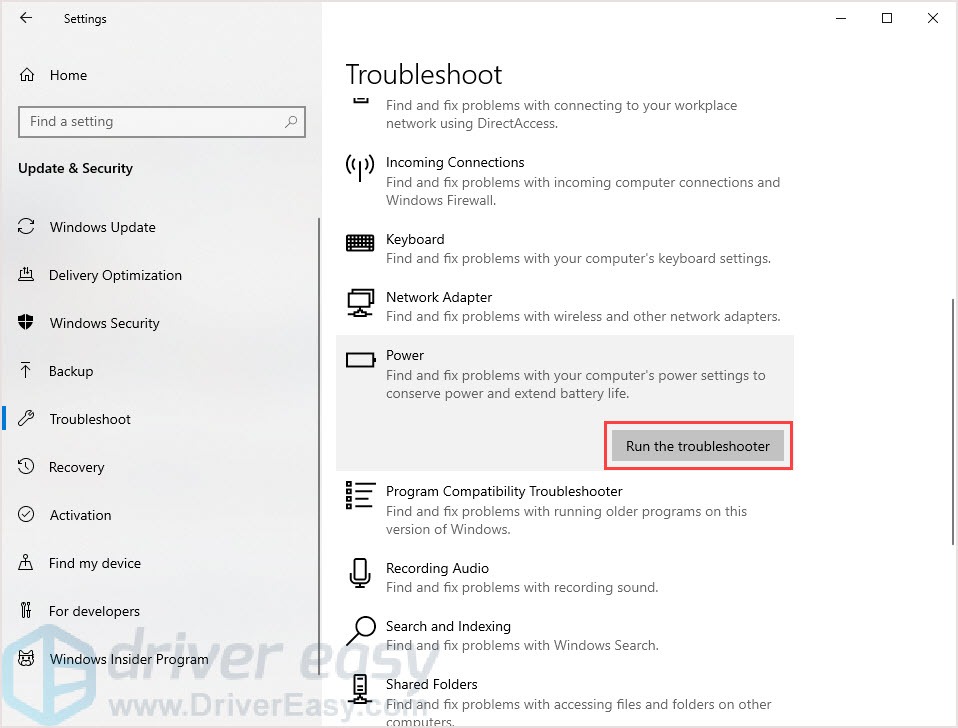
- Choose the Troubleshoot tab then click Power > Run the troubleshooter.
- Follow the on-screen instructions to finish the process.
- Check the problem is resolved or not.
Fix 4: Update your device driver
Your hardware may have an incompatible driver which leads to the Windows system can't go to Sleep Mode. Updating your drivers to the correct and the latest version may solve the issue.
There are two ways you can update your drivers:
Option 1 – Manually – You'll need some computer skills and patience to update your drivers this way, because you need to find exactly the right the driver online, download it and install it step by step.
OR
Option 2 – Automatically (Recommended) – This is the quickest and easiest option. It's all done with just a couple of mouse clicks – easy even if you're a computer newbie.
Option 1 – Download and install the driver manually
Devices keep updating drivers. To get them, you need to go to the manufacturer website, find the drivers corresponding with your specific flavor of Windows version (for example, Windows 32 bit) and download the driver manually.
Once you've downloaded the correct drivers for your system, double-click on the downloaded file and follow the on-screen instructions to install the driver.
Option 2 – Automatically update drivers
If you don't have the time, patience or computer skills to update drivers manually, you can do it automatically with Driver Easy.
Driver Easy will automatically recognize your system and find the correct drivers for it. You don't need to know exactly what system your computer is running, you don't need to risk downloading and installing the wrong driver, and you don't need to worry about making a mistake when installing.
You can update your drivers automatically with either the FREE or the Pro version of Driver Easy. But with the Pro version it takes just 2 clicks:
- Download and install Driver Easy.
- Run Driver Easy and click the Scan Now button. Driver Easy will then scan your computer and detect any problem drivers.

- Click Update All to automatically download and install the correct version ofall the drivers that are missing or out of date on your system (this requires the Pro version – you'll be prompted to upgrade when you click Update All).
Note: You can do it for free if you like, but it's partly manual.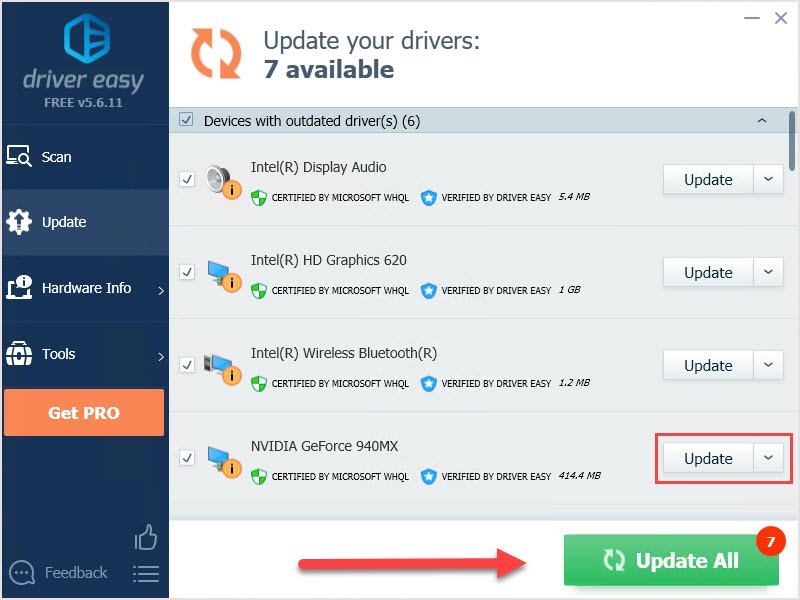
The Pro version of Driver Easy comes with full technical support.
If you need assistance, please contactDriver Easy's support team atsupport@drivereasy.com.
We hope you find the above information helpful. And if you have any ideas, suggestions, or questions, feel free to leave a comment below.
89
89 people found this helpful
Available in other languages
Mit diesen 4 Lösungen in diesem Beitrag können Sie das Problem, dass der Stromsparmodus unter Windows 10 nicht funktioniert, schnell beheben.
Si votre PC ne peut pas se mettre en veille, ne vous inquiétez pas. Notre tutoriel avec des étapes détaillées pourra certainement vous aider.
How to Increase Sleep Mode Time in Windows 10
Source: https://www.drivereasy.com/knowledge/solved-your-windows-10-pc-wont-sleep/